How to Use an Electric Smoker? Basics and Operation Explained!
On a summer evening with the backdrop of the sun about to depart, who cannot imagine oneself as sitting on a lounge chair in the backyard preparing or being served smoked delicacies.
Nostalgic, right?
I mean I think it is a grave loss to let the summer go without hosting at least one of these barbecue-grill-smoke nights.
Additionally, in today’s date and time with the convenient rise and availability of machines such as electric smokers, we can not only cut down on time for smoking food but also get mouth-wateringly delicious results.
Hence, in this article, I will give you all the information regarding how to operate an electric smoker flawlessly.
More...
Basics of the Device
One of the most lucrative lures to using an electric smoker lies in its usage simplicity.
Designed to slow-cook food to perfection overtime impeccably, an electric smoker is ideal for all types of food consumers, including vegetarians.
By using the device, you get to work with a versatile range of food groups such as meat, fish, vegetables, nuts, and even cheese!
Using an electric smoker, there is not much to do to get a plateful of appetizing smoked delicacies. All you have to do is:
As for the rest, just let the device work its magic! Easy isn't it?
While with other type of smokers, you have to continuously slave yourself to regulate the temperature, individually time it repeatedly, and check on the fuel usage. However, an electric smoker requires none of these extra hassles.
For an incorporated digitalized control board spells one time set up only! Just follow the simple steps mentioned above and check on the proceedings when you feel curious enough!
How to Operate the Device?
Now that you know the very elementary aspect of using the device, let us move on to the details that will help you to master the art of the food smoking technique!
1. Get to know Your Electric Smoker
This is much in link with the philosophy of “know thyself.”
For you will only be able to expertly handle a device when you know what exactly it has to offer. A quick go through with the user manual provided is an excellent help in this aspect as it tells you all you need to know about your appliance.
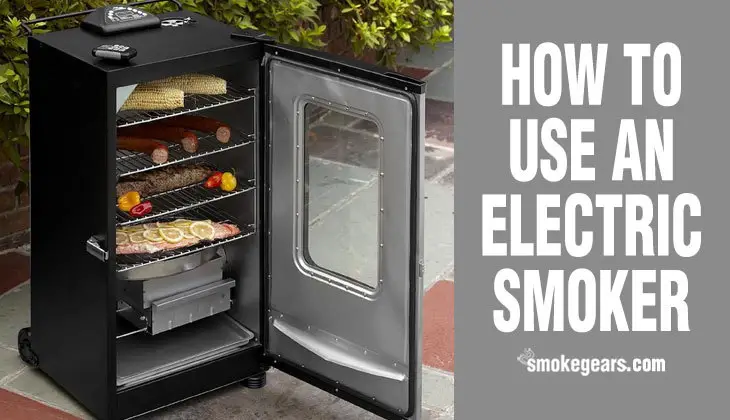
That being said before proceeding to cook, it is also wise to familiarize yourself with the device and check for any discrepancies. Usually, electric smokers are spacious in size and come with:
Depending on your purchase choice, different models may also come with other additional features.
2. “Seasoning” the Device
Now, this is a step you need to follow only once and that too, when the appliance is brand new. Although with technology ever in its advancement, newer models in the market may not require this process at all.
Here again, you can take your guidance from the user manual as it will specifically outline if the process is required at all, and if yes, then how?
So, what is seasoning you ask?
Well, it is a careful process done to get rid of the dust, paint smells, or other such residues that may be present in the device during construction.
As all these elements pose a threat to contaminating your foods' flavor, aroma, and quality; thereby, it is a crucial step to abide by.
Seasoning is usually done by carefully rubbing cooking oil into the device's interior including the racks, roof, sides, and floor, and then turning on the device. Let it run at a temperature of 250–270 degrees Fahrenheit for a minimum of 2-3 hours uninterruptedly.
Once the time passes, turn of the power, open the lid of the device and allow it to cool off before proceeding to start your cooking completely.
3. Turn on the Power
Once you are done with seasoning and familiarizing yourself with the device, it is time to power on the device for the real action.
Usually, an electric smoker comes with its digital control panel. Plugin the device's power cord to an appropriate electrical source and then press the power button on the control panel.
Note that pressing on the power button will not activate the heating element to raise the temperature. This will only set your smoker on a standby mode. Temperature rise or heating will only initiate when you separately adjust the temperature and time controls.
This feature thus gives you ample time for other preparations without having to get distracted about electricity consumption.
4. Place the Wood Chips
The delicious smoky flavor of the food comes through this process. Just place the wood chips of your choice into the designated tray to its full capacity and then slide into place.
Depending upon the model type you may have to turn the tray clockwise or anticlockwise to dump the chips on to the heating chamber installed within.
The length of the recipe will decide whether you would need to refill the wood chips or not. However, it is usually estimated that around 4 cups of wood chips are good to go to keep the smoker running efficiently for 3-4 hours.
Besides, flavor and aroma of the smoke are greatly influenced by the type of wood chips being used.
As a result, though cedar, applewood, hickory, cherry, maple, or plum wood chips are very popular, the decision to ultimately use one over the other depends on the recipe and your aromatic appreciations.
5. Preheat the Device
Once the wood chips are in place, it's time to preheat the device to establish the temperature tone within the smoking chamber.
As mentioned before the electric smoker comes with digital temperature and time control panels. Thereby adjust the heat by going up or down and set a moderate temperature of your liking to pre-heat the device for a certain amount of time (mostly 20-30 minutes).
200-225 degrees Fahrenheit is usually considered the most accommodating temperature for smoking. Hence you can use this reference as a starting point, or you can always follow your recipe book instructions. Pre-heating the device helps to fasten up the cooking process.
This is because in a pre-heated chamber, the food once placed gets the precise temperature from the start, and therefore it begins to cook immediately without any delay.
6. Control the Moisture
Nowadays, most electric smokers come with a water bowl. But even if it doesn't, you can easily use one of your pot or trays (preferably of aluminum). Fill the container with hot water and place it in the designated slot or floor of the smoker.
Usually, hot water is preferred to cold as it will not tamper the temperate created through pre-heating. Placing water inside a smoker is vital to maintain the moisture within.
As the water will evaporate from the heat, it will help the meat to retain its moisture, thereby resulting in more tender and juicier textures.
Also, you can further spice up the flavor of the dish by adding aromatic herbs or other liquids such as beers, fragrant wines, etc. to the water bowl.
This will not only help to balance the moisture but also liven up the taste of your dish more interestingly.
7. Set up the Food
Once you have done preparing the device, it is now time to place the choice of your food.
As for how to season your foods and meats, I wouldn't be going into the details as it ultimately depends upon your recipes of choice.
However, you should be careful while placing the food into the designated racks as the smoker would be very hot to touch due to the pre-heating.
It is usually advisable to place chunkier or more substantial pieces of meat at the bottom racks with the lighter pieces on the top. This is because the bottom of the smoker is usually the hottest part of the device and therefore, it will help to cook up the heavy meat pieces faster.
Once you are satisfied with the food placement, position the drip tray at the bottom of the smoker to collect the food drippings during the long cooking hours.
Whilst everything is set, close the lid and secure the lock once and for all.
Tips: Know the differences between electric and charcoal smoker here.
8. Start the Cooking
With the lid closed off all that remains is to adjust the temperature to your required measures (if pre-heating was done in a lower temperature) and then set up the timer.
Relying on your recipe, the timer could be set anytime between 2-8 hours.
With some models of electric smokers, you can also control the airflow within the device. Here too, it is better to control the airflow in a similar pattern throughout the cooking and not experiment much as it may lead to food's doneness discrepancy.
It is essential to note that the lid should not be opened anytime during the cooking process unless it is to refill the water bowl or wood chips.
But even under those circumstances be prepared to do the task and close the lid as early as possible so as not to disturb the temperature within.
With things in motion, now all you have to do is wait till the timer tells you otherwise.
Things to Remember When Using an Electric Smoker
Electric smokers are somewhat easier devices to handle with their “turn it on and leave it be” mechanism, but even then, there are some things to consider when using one of these tools at your home.
• Always Place Your Electric Smoker in a Well-Ventilated Space
You should keep electric smokers in open garages or yards. This is because sometimes fuel in the device may not be completely burned out, resulting in the accumulation of carbon monoxide.
As it is a poisonous gas, I need not emphasize the devastating effects it may portray in a closed-up space. Hence well-ventilated areas are always preferable for smoking as it circulates the smoke away efficiently.
• Secure the Power Source
We know that, electric smokers are corded devices, it is important to double and even triple check the power source to it is connected to, and make sure that it is stable enough to support the device during its run.
Furthermore, you should also pay attention to the placement of the device's cord, as you wouldn't want to trip and cause an accident or disconnect the power supply.

• Remember Their Bulky Size
Electric smokers are not very mobility flexible, nor are they keen upon humid places. Thus, it is vital to keep both these points in mind when placing the device in your home.
• Follow a Regular Clean Up Routine
Once done with cooking, allow the device to cool down completely before attempting to clean it up. Foil wrapping the drip tray in advance will help you to clean the greasy interior easily.
You don't need to use expensive solutions to clean a smoker. Just use a soft cloth or dish towel and soapy water, and it should do the trick. For drying the device, you can opt to rub the interior with dry paper cloth or leave it be to run dry naturally.
Conclusion:
It is important to remember, at this point, that smoking food is an extremely patient task. Much in sync with that of weekday finishing trips.
So, it is better if you mentally prepare yourself in advance as the cooking wouldn’t be done anytime soon and would take its own sweet time till the end of the last second of the timer.
I hope this article will be of help to you.
Also, if you have any further queries regarding the use of an electric smoker, feel free to ask anytime. Until next time, adios!


