How to Barbecue in 12 Simple Steps?
A Beginner’s Guide
Sun's shining bright, and it’s time to bring out the barbecue, gather around your family and friends, and have a fabulous outdoor bash.
In barbecue, you will get crispy and delicious food. It is a simple form of cooking without much hassle.
Without further ado, let's get cracking as we break down how to cook a barbecue.
Jump To The Right Section
A Step by Step Guide For Barbecue

Get to Know BBQ
Barbecue is one of the ways of cooking food. It involves direct contact with heat.
In this form, pieces of food such as fish, meat, vegetables, etc. can be cooked without any cooking utensils.
Moreover, a smoky taste from direct contact with heat intensifies its flavor and gives a depth to your style of cooking. It shows technique without any stressful steps.
BBQ makes sure your choice of protein is very juicy from the inside, and also crispy from the outside. Cooking on stovetop requires pots and pans; however, barbecuing involves little less.

Equipment Required for BBQ
This form of cooking is possible through a grill otherwise known as smokers too.
Grilling appliances vary depending on its highlighted features. They have different power sources and purposes, and various designs to complement your backyard or deck.
So, make sure to get the right one for your place as well as that benefits your cooking style.
Generally, grills are designed to have a firebox, grill grates, and other features according to the purpose. The firebox is where the fire is lit and contained for cooking purposes.
For beginners, gas grills are simpler to use. You can find grilling equipment which serves your purpose at any supermarket.
Also, you can make online purchases because these are available on the net too. However, make sure to read the label for its features.
Additional Tools:
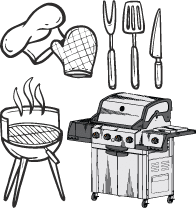
Tongs or Long-Handled Spatula: Tongs are great to handle meats and vegetables, but spatulas work with ease for delicate foods such as fish fillets that need a swift flip.
Grill Mitts: These mitts come in different materials such as silicone, leather, fire-retardant fabrics, etc. that protect you from flames when handling food.
Grill Brush: For healthy grilling, it's essential to clean any residue of previous cooking as well as dirt from staying outdoor.
Meat Thermometer: Grills can cook meat at a different rate, so if you insert this thermometer in the center of your meat, you'll get to know its cooking temperature.

Two Types of Heat for BBQ
1. Low and Slow Cooking
In this method, food is cooked with little or no contact with the fire.
Mostly, the heat from the fire slowly cooks the food by softening it at first. Then the juices inside the food are cooked to give it a moist and tender finish.
It is more scrumptious because the flavors intensify within the food for a longer time.
2. Searing
Later on, this method gives a crispy surface to your meal.
You can do it by placing the food directly above the fire. Then, it is cooked quickly to brown the surface of the food.
Moreover, it’s a concise process; precisely 6 minutes per piece.
This method does not cook your food. It only sears your food to give it a crunch and crispiness as well as excellent color for presentation.
Steps for Barbecue
Step 1: Get a Grill, Smoker, or a Combo
All you need for barbecue is equipment.
There are several types of grills and smokers with different purposes and power sources. These power sources fire up your barbecue.
Usually, smokers contain the fire in a separate place as well as keep the heat low enough around 110 C to 120 C.
On the other hand, grills are designed to cook food fast and hot. Moreover, it keeps the fire in open space below the food for direct heat contact.
So, it is based on what you seek.
Types of Grills:
Types of Smokers:
Therefore, you should choose a grill or a smoker based on your style of cooking.
However, if you are a beginner at a barbecue, have no fear. We understand it can get tricky while choosing equipment for yourself.
That's why we picked out some; featuring a simple design and easy to use.

Step 2: Assemble Your Grill
For assembling, you should have someone by your side.
However, it is not as daunting as it seems. All the grills and smokers come with a manufacturer's guide. So, take a sigh of relief.
Moreover, you should power up the grill as soon as you assembled it to ensure it's legit. Make sure it works correctly and does not have any defects.
If you find any fault, immediately report to the manufacturer.

Step 3: Clean Up Your Grill
In case your grill is not brand new or has been tucked away for a while, you should make cleaning your priority.
For a Safe Barbecue-

Step 4: Prepare Your Fuel
Your choice of equipment may vary, but wood chips are the most suitable for your barbecue fire.
Naturally, wood chips are made out of wood; however, they are not just pieces of wood.
They are seasoning elements for your barbecue, and it is necessary for inserting your choice of flavor into your grilled food.
Wood Chips Flavor-
Pecan, apple wood, oak, hickory, maple, mesquite, alder, etc.
One great thing, most of the wood chips go with any type of seafood, meat, or vegetables.
So, the choice of flavor also depends on your taste palate.
Usually, these wood chips are safe to use; however, you should not substitute for work woods as they may have chemicals. It can contaminate the healthiness and flavor of your food.
Also, you should discuss with the store helper while buying wood chips. They can advise you suitable wood chips based on your grilling recipe.
Prep Your Wood Chips
One last thing you should remember that all types of equipment are suitable for soaked wood chips except offset smokers.
Make sure to use dry wood chips if your choice of equipment is an offset smoker.

Step 5: Ready Your Food
If you have a dish in mind, then your choice of food is clear.
However, you should always go for thicker cuts of fish and meat for the barbecue. Thicker cuts do not flake easily. They hold their shape together throughout the cooking time.
If you are barbecuing the second time or poised on your first try, you can use dry rub consisting of various spices on your food.
However, you can enlighten yourself with recipe books or the internet. It can offer a wide range of marinating mixture for a barbecue.
But first, let us help you in seasoning your meat.

Make sure to not marinate for too long. Check the texture of your meat as it might alter from marinating too long.

Step 6: Power Up Your Grill
It's time to start your grilling machine, but do not begin grilling your food just yet.
There needs to be enough heat already present before barbecuing. It is necessary to preheat the grill because of two essential reasons.
Therefore, it is better to be safe than sorry.
However, you should keep in mind that all the grills and smokers have a different style of lighting.
In that case, take aid from the manufacturer's guide that comes with the equipment.

Step 7: Prep for Flavoring
Adding Wood Chips
Using the Water Pan
If you remember correctly, it was said to keep the water used for soaking wood chips aside for later use.

Step 8: All Set for Cooking
Before you start cooking, remember that the initial step is to keep the food in low indirect heat for a longer time.
Barbecuing is the process of slow cooking, usually from around an hour to 4 hours on low or medium heat. This lets your food have a good texture and taste.
On the other hand, smoking requires days of work and great patience.
That is why; we suggest grilling for getting amazing barbecued food.
Now, onto how you can achieve that. Do not worry. We made it easier for you by listing all the steps for your BBQ.

Step 9: Use the Cooking Tools
Barbecue deals with direct heat and flames, so you should keep safety your utmost priority.
Tools can keep you away from heat and smoke as well as protects your hands from burning.
Alongside these, some tools help monitor your cooking temperature, and to deal with delicate food on the grill.
Therefore, make sure you have these tools near when it's BBQ time such as grill mitts, tongs, spatula, meat thermometers, spice brushes, knives, and plates, etc.
Further information on additional tools is mentioned above in the equipment section.

Step 10: Check Temperature for Finish
Most of the grills have built-in thermometers. These thermometers can measure the temperature inside the device.
However, you should purchase an additional thermometer for food.
A food thermometer is essential to check the state of doneness in food. If the time for cooking is finished, just insert the tip of the thermometer into the food to check for surety.
Temperatures for proteins are mentioned above. However, you can still take aid from recipes for further information on that particular protein.
Furthermore, you can adjust temperatures, smoke, and heat by using the dampers, chimneys, and vents available on the grill.

Step 11: BBQ Food Is Ready
Even though you take your food off the grill, you cannot serve just yet.
End Steps – Carryover Cooking: This method is to take your food off the grill about 15 minutes before its estimated cooking time. It’s done to prevent any overcooking, and a fact that food still cooks even when you take it off the fire.
In this way, the juices inside the food will settle in, and also the food will cool down enough for eating.

Step 12: Clean While Still Warm
It is better to clean off your grill while your food is in carryover cooking and resting.
Moreover, since it is still warm, juices are still in liquid form, you can easily wipe them off.
Some vertical grills have a dripping pan, which traps grease and juices. This feature helps in easy cleaning.
Good to Go
Barbecue is a great way to utilize your backyard. You can cook as well as interact with your guests and enjoy the great green outdoor.
Hopefully, you are well prepared to get cracking on how to cook a barbecue and show your skills and wow your guests.
Related Posts:
Amazon Disclosure: SMOKEGEARS.COM is a participant in the Amazon Services LLC Associates Program, an affiliate advertising program designed to provide a means for sites to earn advertising fees by linking to Amazon.com. Amazon and the Amazon logo are trademarks of Amazon.com, Inc., or its affiliates. Additionally, smokegears.com participates in various other affiliate programs, and we sometimes get a commission through purchases made through our links. Smoke Gears also use AdSense. We use Ezoic to provide personalization and analytic services on this website, as such Ezoic's privacy policy is in effect and can be reviewed here. For questions about this website, please contact us via CONTACT FORM


