How to Use an Offset Smoker Properly – Explained in Step by Step
Let's admit it. We, as a nation is obsessed with barbecuing their foods.
Whether it’s a birthday party, garden party, couple’s dinner by the pool, hang out with friends or 4th of July celebrations, none of these little triumphs in life seems to be ever truly complete without tasting the delicious, smoky flavors of a well done barbecued meat.
Now, for that, we need a good smoker. That's what our subject today; offset smoker.
I am aware that many people do not know how to use one. That’s why we have come up with this article to teach you how to use an offset smoker.
More...
Why Use Offset Smokers?
So now you may be wondering why to use such an intimidating looking device when nowadays there are more straightforward options such as electric smokers readily available for barbecuing processes.
Well, I will tell you why. The answer boils down to one word. Tradition.
This tradition we are speaking off is not only related to the customs of seeing our father and grandfathers cooking the meat on the grill, but also indicates to the tradition of our taste buds trying to reach out to its gastronomic roots.
Feeling nostalgic and want to taste the BBQ of your childhood days? Well then look no further that the offset smokers to bring you the authentic flavors of a genuinely satisfying barbecue meal!
Is Offset Smokers the Right Choice for Me?
When choosing to buy a barbecuing device, there is no right or wrong choice of instrument.
Instead, what matters most is how much you are willing to invest yourself in when thinking of undertaking the barbecue action. For example, if you are someone who is not very confident around grilling maneuvers and open fires, then I will recommend you use the electric ones.
On the other hand, if you are the adventurous sort who likes challenges and revels in learning to master the raw techniques of any trade, then offset smokers are for you!
But that doesn’t mean it is a complicated device to handle. Not at all!
For an offset smoker with their grills laid in half-opened barrels connected to a small side box, one end and a chimney on the other looks only intimidating from a distance.
However, upon leaving your trepidation behind, if you only care to use the device once, you for yourself will see how easy of an instrument it is to handle.
Nor would it be far-fetched to say you might even fall in love with it!
Hence without any further ado let’s straight jump into the dynamics of the device and get to know how to work it accordingly to reach the maximum efficiency in our barbecuing endeavors.
Step 1: Get Acquainted with the Device
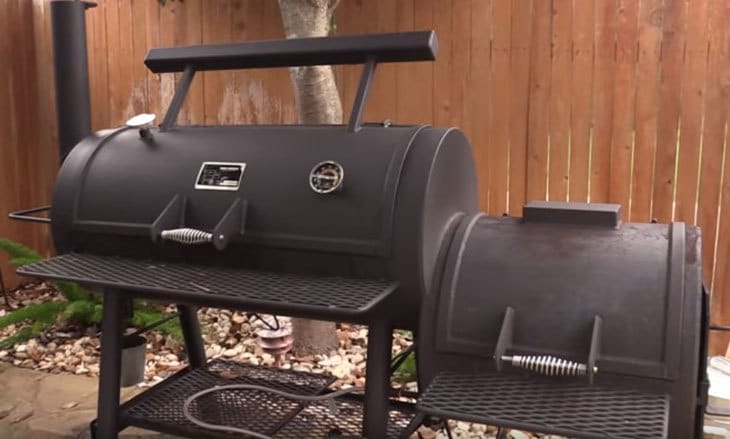
You already know how an offset smoker looks like.
It is a long rectangular grill attached to a barrel-shaped chamber (with a flexible lid) where foods are initially placed to be smoked and grilled at convenience.
But it does not end here. The barrel-shaped chamber is in turn connected with a small side box at one end and a chimney on the other, and this where the magic begins.
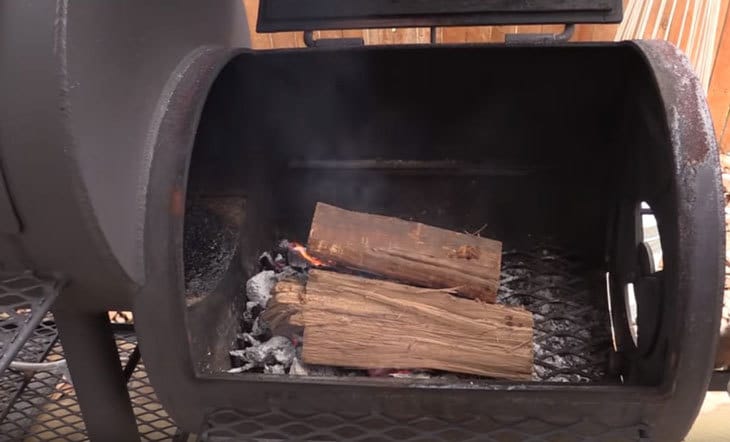
In the small side, the box is the powerhouse of the instrument, aka the fuel storage. It is ordinarily in this side box that the fire using different fuels is started to generate the smoke.
The smoke hoarded over time into the smaller space is gradually observed to troop towards the connected barrel chamber where foods are placed ready to be cooked.
So, you see the food in an offset smoker is only cooked by the heat and smoke generated by the fire in a separate chamber which ultimately results in their traditionally mouthwatering smoky flavors.
The chimney connected on the other side of the device is more or less a ventilation agent. It helps to eliminate excess heat by regulating the airflow within the device and to an extent, assists in controlling the BBQ temperature altogether.
Step 2: Season the Device
This is a process that needs to be only done once, and too right after you have purchased the device.
“Seasoning” is nothing but a precautionary step taken to rid your brand new smoker off any unpleasant smell (examples paint odor), dust, or grease residues left behind from its manufacturing process.
If not taken care of the smell, dust, or grease (that is if there is any) runs the potential risk of contaminating your food flavor and aroma. This is a significant negative bearing in mind that the entire idea of thinking to undertake barbecuing in the first place is to get those two specific things right (i.e., flavor and aroma).
So, here is how to season your offset smoker-
In case you are in a hurry to cook instead of letting the fire die-off, you can just let it run for the 30 minutes length and then start the cooking.
Step 3: Open All the Vents
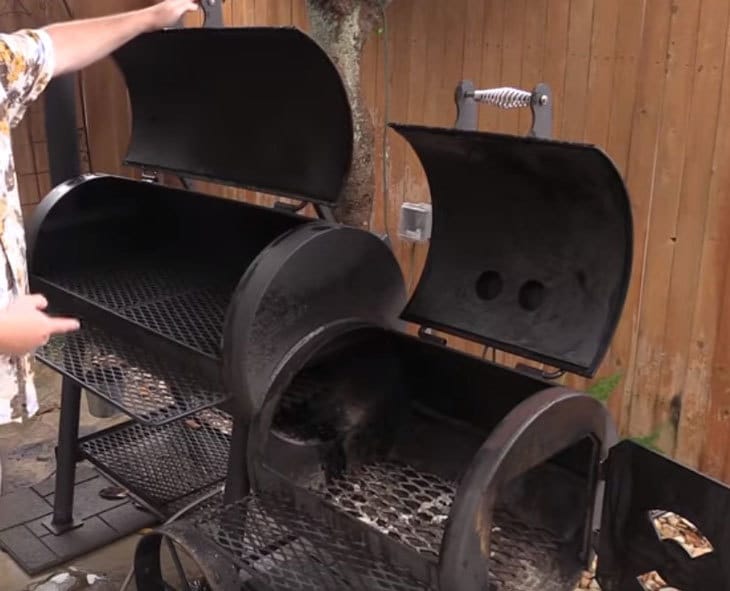
Vents, also known as dampers in an offset smoker helps to regulate the airflow into the device.
As you need to feed oxygen to the fire to keep in burning for long, hence vents in the smoker come to their use by letting the air in and out per your temperature or fire intensity requirements.
There are generally two vents present in the offset smoker one that links the side smoke/firebox to the cooking chamber. The other connecting the grill/cooking chamber to that of the chimney.
Thus, vents create a continuous and unobstructed airflow system within your smoker along with giving you the advantage to control the heat and smoke outputs to your specifics.
Step 4: Fuel Up the Smoker
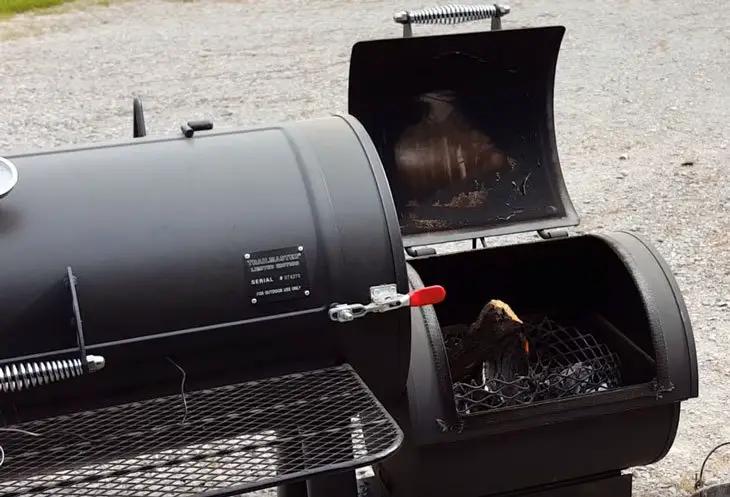
One of the reasons why most people like to use an offset smoker is the fact that they use fuels such as charcoal pieces or any time of wood lumps to get the device running.
Not to forget these types of fuels are also very practical and budget-friendly, making them an ideal choice to be used without any restraints
Given below are the best ways to start a fire, generate the heat, and circulate the smoke inside your offset smoker:
Step 5: Preheating the Smoker
Once your coal or wood is all lighted up and producing the heat and smoke, accordingly, close all the lids of your smoker and allow it to heat up for a while slowly.
This method is known as preheating, and it helps in stabilizing the temperature throughout the device. The process also benefits in speeding up the cooking process as the food once placed inside a heated smoker receives the accurate heat from the get-go, which in effect, initiates the cooking immediately.
When starting to preheat, it is usually advisable to begin from a low temperature say 100 degrees Fahrenheit and then depending on your recipe requirements to gradually move on to higher temperatures such as 300 degrees Fahrenheit.
Graduated increase in temperature helps you to acquaint yourself with the device better and also assists in preparing your food without running the risk of burning them. Correspondingly as well it provides a safe cooking environment.
Step 6: Placing the Food
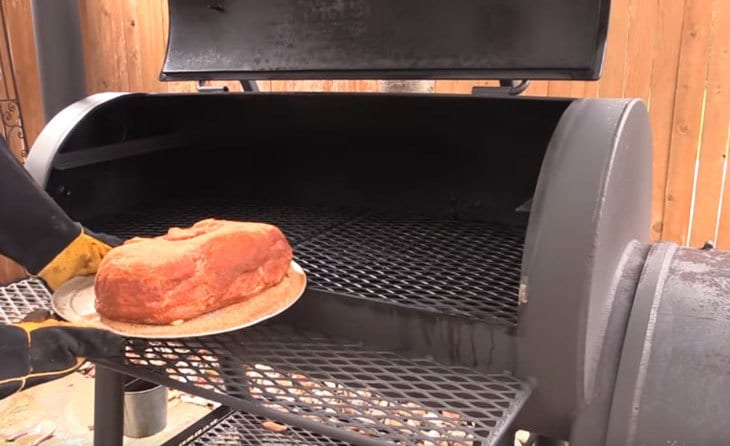
Once preheating is complete, all that is left to do is place your favorite marinated and seasoned dishes onto the grills in the cooking chamber.
Now I wouldn't dare to tell you how to season or marinate your foods, for there lies a discussion of much debate and exclusive culinary independency.
But what I would tell is try not to crowd your foods close to each other. Place them in such a way so that each piece has the breathing space it requires to get that rich smoky flavor.
Also, you can directly place cold meat into the grill without having to normalize it to room temperature. On the contrary, it is advisable to put frozen meat on the grill as in that way the food absorbs more smoke into it, resulting in that desirable flavorful aroma.
Once you have set the food in place and checked the temperature close to the lid of the cooking chamber.
As with all barbecuing techniques, you already know it is not wise to peak or regularly open the lid to check on the food as it varies the temperature leading to uneven cooking textures.
Therefore, once you close the lid allow at least an hour to pass before checking on the food.
Step 7: Controlling the Temperature
Depending upon the type of food you intend to barbecue, the temperature of the smoker will need to be adjusted somewhere around 210-300 degrees Fahrenheit depending on the recipe.
However, 225-275 degrees Fahrenheit is usually considered the optimum temperature.
Controlling the temperature of an offset smoker is perhaps the most essential task of the entire process and requires a lot of attentive and patient observation on the part of the user.
But you don't have to despair hearing this. For most offset smokers nowadays are equipped with meters or gauges to help you read the temperatures. What more! Some of these gauges help you to observe the temperature in the cooking chamber and the fire compartment separately.
This feature helps you to decide when to turn up or take off the heat to and from the smoker to cook your food to perfection.
To Increase the Heat
To Decrease the Heat
Conveniently again to measure the temperature of the food itself most offset smoker comes with temperature probes.
If you have experience with baking foods, you would know how a probe works. Just poke it in the densest part of the meat and read the temperature, and in this way, you would know when to take the food off the smoker reliably.
Step 8: Adding Moisture
Some people complain that smoking often leaves the food dehydrated to the taste. However, this problem can very easily be counter measured in the following ways.
Source:
Few Additional Tips
Now, I’d like to share some additional tips for your next offset barbecue party;
Wrap Up: Using an offset smoker for the first might seem a little bit overpowering. But I can assure you that the feeling will only last the first time alone. For once you get the hangover and learn the basics, barbecuing in an offset smoker will be your new favorite toy.
Be prepared to be amazed by finding a variety of experiments that you can challenge and try for yourself when using the device.
Furthermore, this type of smokers by allowing total control leaves the users with a sense of accomplishment similar to a task very well done.
So, let me know your experience with the smoker in the comments.

