How To Use A Knife Sharpener – Step by Step Guides
Sharpening a knife sounds simple in practice. You have some abrasive material, or what we like to call the grindstone, and you rub your knife blade on that stuff until it's sharp. Easy, right? Well, you're only partially right. See, sharpening a knife is like an art in of itself. Not every sharpener works like an electric one, after all.
We've taken the liberty to provide you with a step-by-step guide on how to sharpen your knives on each different type of sharpener you can find on the market. Including whetstones and knife sharpening systems. Never feel that these tasks are daunting, as they're quite easy! All that's required is practice. So, without further ado, let's look into how to properly sharpen your knives!
Before we go into how to use the knife sharpener let's take a brief detour to go over how a sharpener actually works.
More...
How Knife Sharpening Works
We'll discuss how to hone your knife in our next article, for now let's focus on how sharpening your knife works. Knives are, of course, sharp and this is due to having a very thin edge. This is what gives knives the advantage of cutting objects, like pork and beef, into smaller pieces. But having such a sharp edge has a downside; there isn't much material backing it up.
Even if you're cutting the fat of a steak, the materials is causing your knife edge to deform. The sides roll over the edge, the edge gets jagged, and all sorts of other assorted deformities occur just by this simple contact. Using a knife sharpener will, normally, run the blade between two grindstones. These stones are very rough and will scratch your knife, and in turn remove the excess metal from the blade.
There are other ways that sharpeners work, which we'll go over in their respected step-by-step guide but this is a quick recap, so you have an understanding of what goes on when you sharpen your knife.
How To Use Different Kinds of Kitchen Knife Sharpeners Step By Step
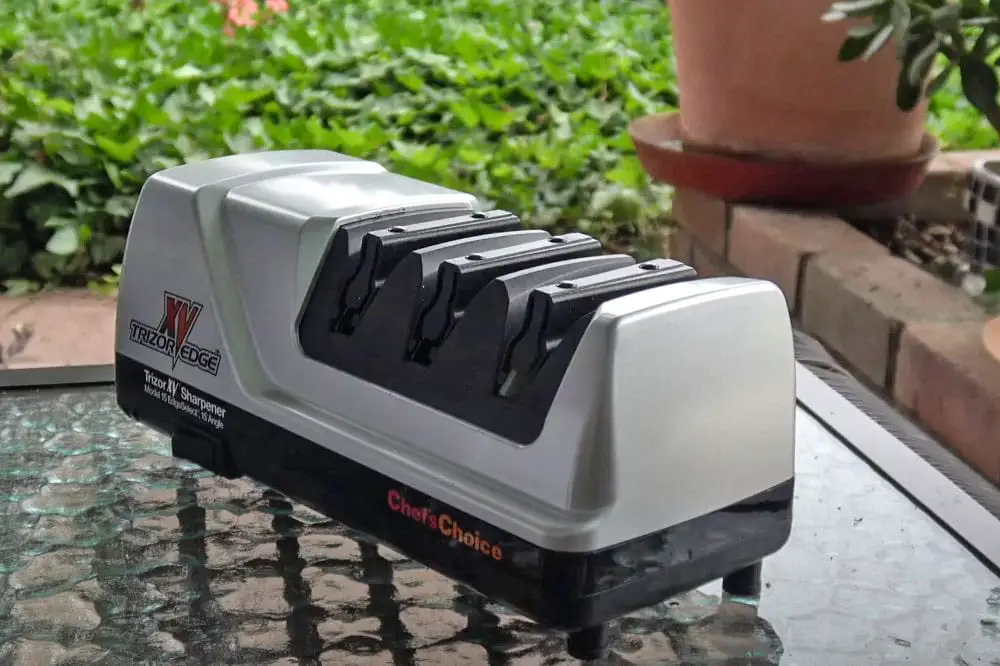
1. How To Use an Electric Knife Sharpener:

We'll start with the easiest, although not at all the cheapest, option on the market. As you recall from our list of sharpeners, electric sharpers are one of the easiest due to being powered. The sharpeners are already moving, so there isn't much manual force you need to assert. This being said, there is still a trick to using an electric sharpener to ensure you get the proper sharpness.
Firstly, know the different variants that your electric sharpener has, or the one you're planning to buy has. Some sharpeners just have two grindstones and that's it. Others will have multi-layer grindstone of varying thickness and grit. Then some are for only certain knives, and nothing else. Once you selected the sharpener that's right for you, it's time to sharpen your knife.
Step-by-step process to use:
Viola! Your blade is now nice and sharp once more! Since the grindstones are powered, you don't really have to pull your blade along the contour. We'll explain what the contour is in a moment. The grindstones and grit should do the sharpening fine for you where you don't have to maneuver your blade at an angle.
You are, of course, more than welcome to try sharpening your blade along with contour with an electric sharpener. We generally didn't see any improvement over the method listed above, but it could be due to the knives we were using.
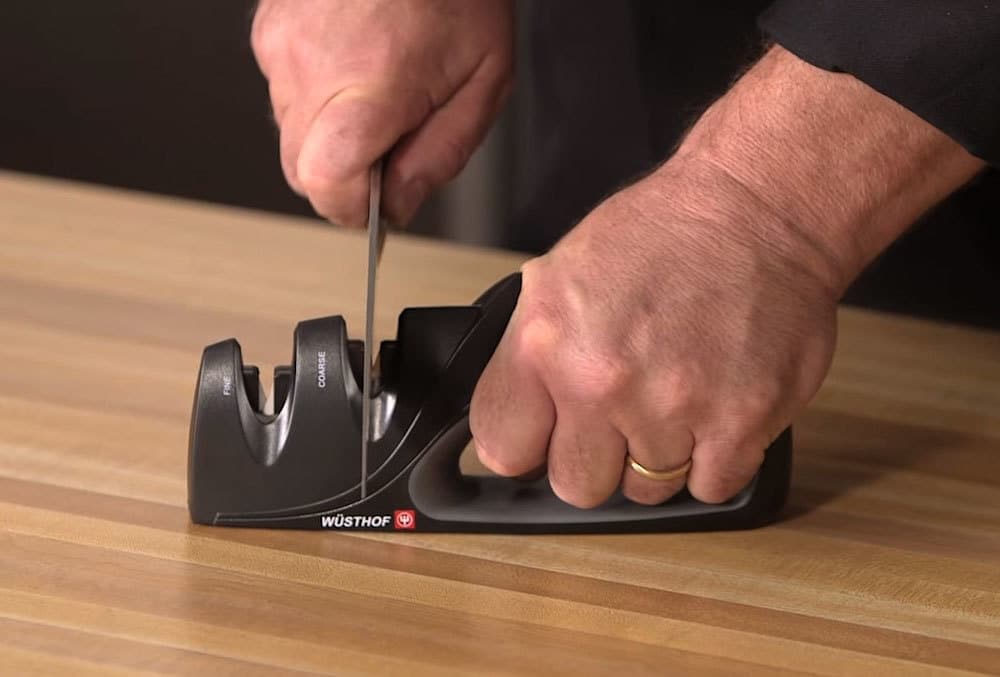
2. How To Use a Manual Handheld Sharpener / Pull-Through Knife Sharpener

The next sharpener on our list in the one you're likely familiar with. These sharpeners come in many shapes and sizes, but all function similarly to one another. Essentially, they function like the electric sharper, just without the power. Two grindstones are placed on opposites side in a jagged fashion, and the blade of the knife including the tip is pulled through. This removes excess metal and leaves a finer blade.
So, does this mean you can just pull your blade through and be done with it? Of course not. You need to run the blade by its contour which we were discussing in the last section. Putting it rather simply, the contour is the curve of the blade. By sharpening along the contour, you're ensuring the entire blade is sharpened and this will lead to you not having to sharpen so often!
Step-by-step process to use:
Your blade is now nice and sharp, and you can get back to what's most important, barbecue! You'll noticed that with manual sharpeners there is quite the large array on the market. We recommend one with a coarse slot, a grit slot, and a fine slot. Manual/Pull-Through sharpeners are one of the easier sharpeners to learn, along with one of the cheapest.
If you want your knives to last, you want to keep at least one of these sharpeners on hand either with your grill or in the kitchen.
3. How to use Sharpening Stones / Whetstones
As we covered previously, a whetstone is much different than a regular sharpener. It's a flat stone that normally has different fineness depending on the side. Unlike the other two sharpeners, there is a very steep learning curve and you're likely going to damage a few of your knives trying to use a whetstone. That's OK, practice makes perfect and try using lower quality knives first off. If they're damage, no harm done.
Step-by-step process to use:
And that's all you have to do! Of course, this is easier said than done and it'll take a bit of practice before you can master a whetstone. As a quick side note, let's talk about why you need to add water or oil to a whetstone as opposed to any of the other sharpers. Your knife can actually heat up while using a whetstone, and this head can easily damage the structure of your blade.
Water or oil is used to keep the blade cool while sharpening. A hot blade is more prone to buckling and this makes it, rather ironically, even less sharp than what you started with. All whetstones are different, and some need to be submerged in water for five-to-ten minutes before being used. Others just need water or oil splashed on. Be sure to read the instructions before using a whetstone!
Whetstones are popular for those wanting more precision and control when sharpening their knives. It's certainly not for everyone, but if you make the time to practice you could become quite skilled at it! As we said at the start of this guide, use cheaper knives first for practice before using any of your good barbecue knives.

4. How to use a Knife Sharpening System
The last sharpener is one of the more complex sharpeners. You may remember that we called this type of sharpener not quite an electric sharpener and not quite a manual. We should clarify by being "not quite electric" we mean it used mechanical energy to assist in sharpening that wasn't based on you. Now that we clarified ourselves, let's look at how you would use one of these.
Now if you're unfamiliar with a knife sharpening system don't worry, they're normally in the hands of knife collectors as opposed to chefs or barbecue masters. This said, they still have their place as like a whetstone they offer superior control and accuracy when sharpening. If you want the finest blades kept in their prime, and aren't feeling comfortable with a whetstone, a knife sharpening system may be for you!
Step-by-step process to use:
While not as intense or in-depth as a whetstone, using a knife sharping system still requires some practice. Like the whetstone is does provide a very nice edge to your knife and keeps it really sharp. Perfect for cutting through thick ribs that stubbornly refuse to be cut.
When To Hone And When To Sharpen
Now that you know how to sharpen your knife using any of the four sharpeners above, let's look at the last aspect of your blade. When should it be hone, and when should it be sharpen? We'll discussing honing in full detail in a later article, but for now let's give a quick description of what honing does. Unlike sharpening, which removes metal, honing instead realigns the blade.
Because of how thin a blade is, it's very easy for it to buckle or get deformed. Honing is straightening the blade back into its original position, thus saving the sharpness of the blade. To achieve this, you use a sharpening steel which is a metal rod with a handle. Despite the name, you're not actually sharpening your knife just realigning the blade. Sharpening steel likely sounded better than "realignment stick", we must admit.
For honing with sharpened steel, you want to do this practically any time you're about to use your knife. Even if you only used your blade just a bit before, a good hone will keep it quite literally straight edged. Sharpening, meanwhile, should be performed after an accumulation of over an hour and a half of knife use. So, if you've been using your knife for weeks on end without a sharpen, or just finished a massive dinner, it's time to sharpen it.
You may feel tempted to sharpen your knife after every use, but don't! This will cut back on your blade's life. Instead, hone it after every use and save the sharpener for later.
And now you have the basic understanding of how to use a kitchen knife sharpener no matter the type. Of course, some take a lot more practice than others, like the whetstone. If you're unfamiliar with a sharpener, test out old and dull blades first to get a feel before using your more expensive blades and risk ruining them.
Which sharpener is the best?
That's going to be up to you. A plain electric sharpener will normally cover all your needs, as will the manual/pull-through if you can't budget in an electric model. If you have the time and patience, a whetstone and knife sharpening system will provide you a much better sharpness as well as more control on how sharp you want your blade to be.
Regardless of which sharpener you choose, we hope this guide gives you the basic idea on how to use a knife sharpener so you'll be able to pick one that'll find the most use in your kitchen. We can't stress it enough, but if you want to pick the more advance sharpeners always try dull knives first to get a handle of the sharpener before trying out your expensive knives.


